Lesson #4 at my croptoberfest was inspired by a photo I saw on cM's Virtual Croptoberfest. The photo was actually from a lesson about journling, but the "Starburst" decoration on the page background caught my attention big time!
The starburst pattern reminded me of what I love about modern quilting, the ability to use lots of bright mixed patterned fabrics all in the same quilt. So I decided to focus this lesson of croptoberfest on HOW to create both a traditional and a digital "starburst." And, I challenged my attendees to do the same.
It's great how I teach something and then some folks just SERIOUSLY jump on the band wagon. How much fun.
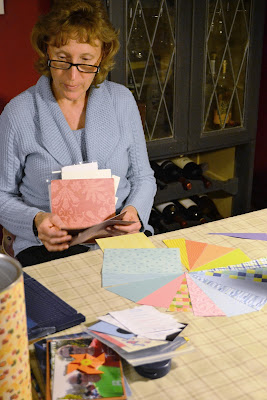
Here are a few photos of my participants, Laura and Sally working on a traditional starburst to use on their pages. Each of them got a ticket for completing the task.
This technique is a tiny bit time consuming, but what I like about it is that you do NOT have to be exact with any measurements AND you can use up lots of scraps of paper or printed papers left over from lots of different random kits.
First. Grab a lot of scraps. How to decide? Well, what colors are in your photos that will go on the page? Select coordinating scraps OR... like me, I wanted a bit of a rainbow of scraps, so I concentrated on grabbing a few papers in ROYGBIV order.
Next, grab a trimmer that has a diagonal cutting line. It doesn't have to have a diagonal line, but it adds to the facility of triangle cutting. Then, select a background square or rectangle. The size of the background depends on how big of a starburst you want on your page. Obviously, if you want it to be the size of the entire page itself, you need to select a 12X12 background paper, and somewhat larger scraps. For the purpose of the photos in my step by step process for this blog post, I am using very small scraps and a very small background paper and making a little starburst embellishment. I've already created two bigger starbursts to use on my pages, so now I just want to make something small.
Because I'm using small scraps, I'm also using the new 7" trimmer to make my triangle cuts. One new feature about the 7" trimmer is the diagonal cutting lines.
Here are my scraps:
Here are the triangles I've cut from them. Just cut random lengths and widths but make sure the triangles can overlap your background:
Make an off-center dot on your background paper and line up the points of all the triangles on this dot making sure they are butted up right next to one another with no gaps.
Use the tape runner to attach each triangle to the background (I just put one splotch of tape a bit near the pointy end of the triangle). I went back later and taped the other end down more securely.
Turn your background paper over so you can see the backs of all your taped triangles. Using scissors, roughly trim away the excess using the background as a guide.
Now, more securely tape the outside edge of each triangle to the background.
Then, use a trimmer to slice off the rough triangle edges in a perfectly straight line along each side of the background paper.
Voila! Starburst. To hide the place where the points meet, use a photo, journaling box or embellishment in your design right at that place so that you don't see any gaps or overlaps where the triangles all meet up.
For those of you who are making a digital starburst, the method is practically the same, maybe even easier. Here are the steps to make a digital starburst.
Create a triangle shape. Stretch and alter the size of the triangle. Copy and paste the triangle several times until you have many and change all of their shapes and sizes so there are a random selection of triangles. I used the Color My World Digital kit to fill the triangle shapes with paper. Then, create a dot on your page. Rotate all of your triangle shapes until the points line up on your dot.
Group and flatten the triangles together. Use the square shape cutter from the cut & fill ribbon to cut the triangles into a rectangle - essentially trimming their uneven edges. In the example above, i added a gold paper background behind my starburst.
Other options are to add lines between each triangle for added emphasis. I created a line, copied and pasted it several times and then rotated it to sit between two of my triangle shapes. I added a photo to my page and a title. Once you create your starburst, consider saving it as an embellishment or paper for additional uses in the future.
Happy Croptober Scrapping - and stay tuned for Lesson #5 and #6 - coming soon! Sher


No comments:
Post a Comment