Cut a square from a double sided piece of paper. Double sided can mean two different colors of paper on each side, white on one side and color on the other side OR two papers taped wrong sides together. Any size square will work.
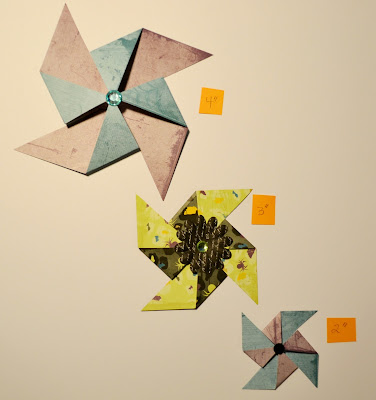
Here are examples of pinwheels using the Hocus Pocus stack pack paper. I've made them from 2", 3" and 4" starting squares. Make a dot in the middle of the square as a guide.
With a pair of scissors cut from the corner in towards the dot. Don't go all the way to the dot. Stop about 1/4" before the dot. Repeat on all 4 corners.
Fold one corner into the middle and then rotate until one side of each corner is folded in towards the dot.
Here are all three sizes with the corner pieces folded in towards the middle.
Next, the middle points need to be adhered down. This is easily done with a sticker, an embellishment or a punched shape.
Here's how mine look with a bit of bling.
Now, what to do with a pinwheel once you've made it? Well add it to a border, a page or a card of course. Here is another photo of my inspiration page.
Here is a sneak peak of my DREAM designs with a few pinwheels in the mix.
One final pinwheel tip. At my workshops I usually have clients working on DIGITAL albums as well as traditional ones. So, I offerend information to my digital clients so that they could add pinwheel bling to their digital pages. In the digital world, you just have to know where to find a digital png file or embellishment of a pinwheel and here are a few places to do that.
1. Digital Freebies from February 2012 - get them from the FREEBIES section of the Creative Memories Project Center
2. Classic Summer Digital Stickers
3. Color My World Digital Kit
I hope you can find a place for PINWHEELS in your scrapping world! Happy Croptober Scrapping! Sher


No comments:
Post a Comment