Wednesday, April 27, 2011

Categorical Albums: tricks & tips

I've been so addicted to digital that I was worried I'd forgotten how to do traditional scrapbooking - not really, but it kinda felt that way.

With my son graduating this year, I was determined to get all of his unfinished traditional albums completed.

I re-discovered the fun of traditional scrapbooking.

Here is a list of 6 little tips I came up with:

1. Four square  - a great way to use up 2 very plain pieces of 12X12 paper, easy and repeatable.


Cut two colors of 12X12 paper in half length-wise with cM Rotary trimmer with straight blade.

 Cut those rectangles in half so that you have 8-6X6 squares
Alternate the squares in a checkerboard style across a double page spread. 

If the papers don't match up exactly in the middle, cover with a photo to disguise.

2. Use Big Diecuts to make original 12X12 paper fit in the center of True 12X12 page

Still have some original sized 12X12, use the big die-cut and center it on a True sized page.

3. REPEAT JOURNAL or JOURNAL PATH (an idea I stole from SBC+)

Repeat Journal a phrase around the outside of a page  - can be done around a big die cut can also be done around the outside of any page or any photo.  The right hand page has the journaling in all green and the left side page in all red.  Another option would be to alternate pen colors on every repeat.

4.  Create "THRU THE YEARS" page spreads


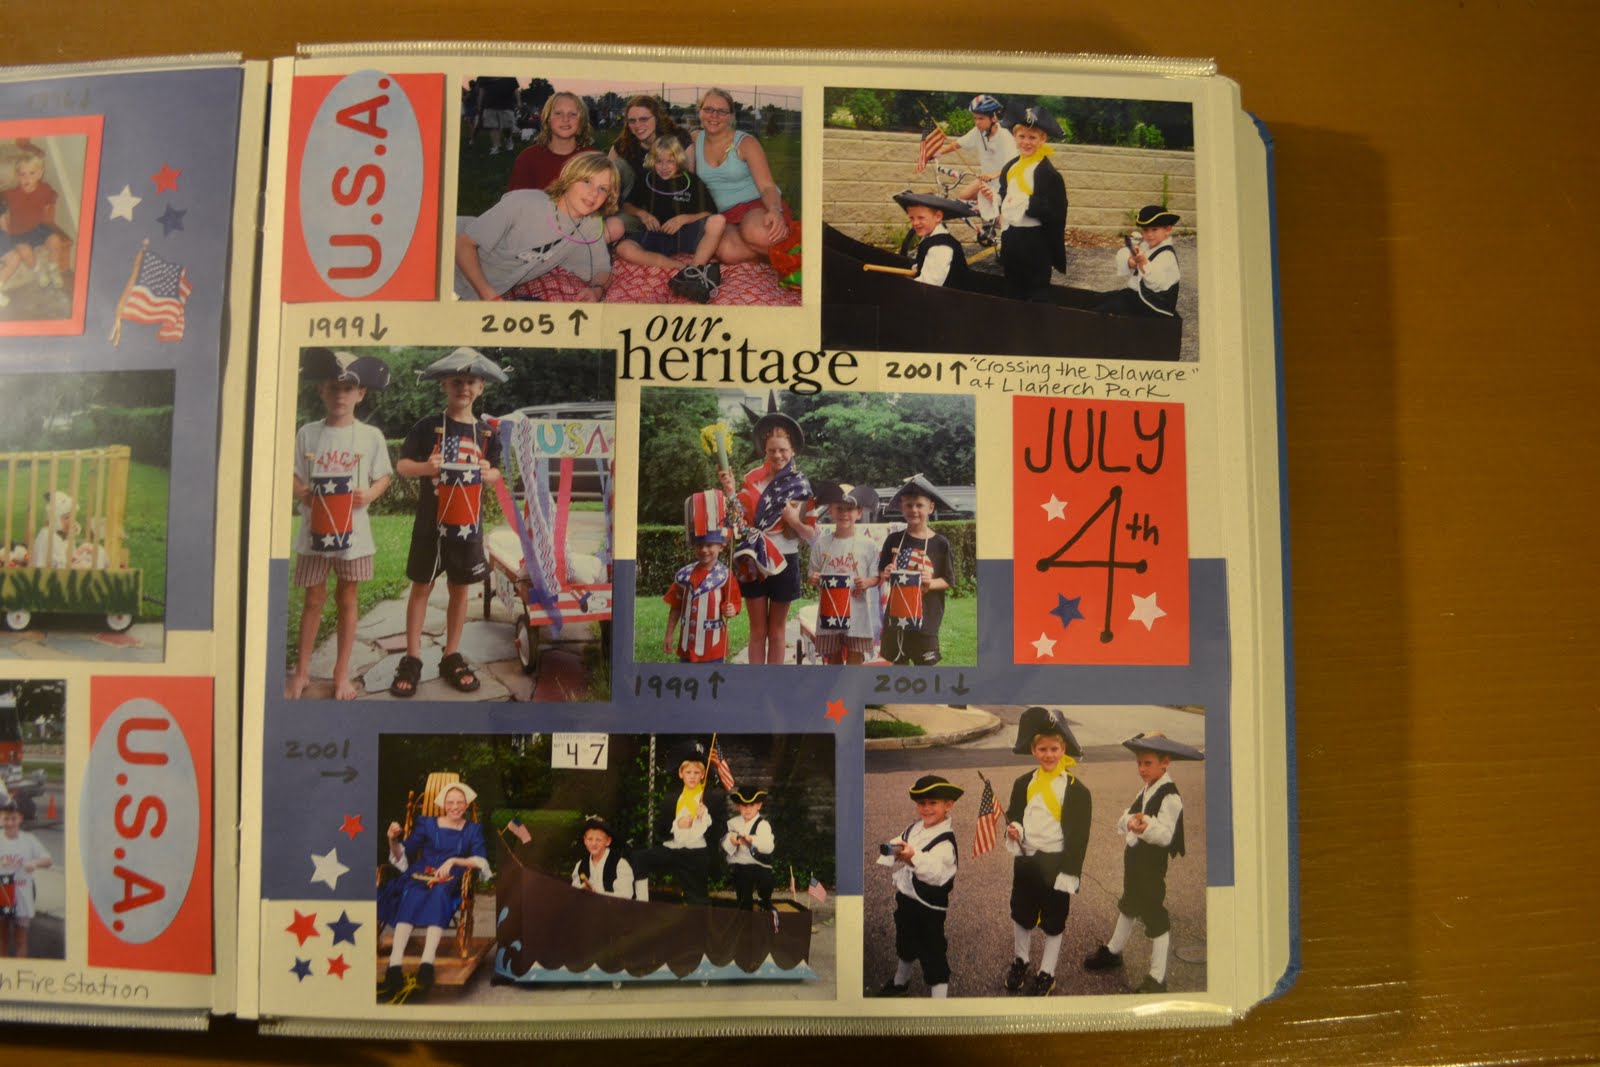
In this 4th of July double page spread I didn't have photos from every year.  This is where categorical albums can bring stress-free scrapbooking.  Just add the photos you do have and identify the year dates of any that you know.


This categorical beach spread shows my son on the beach over a variety of years - it's really cool to be able to see the age progression over the years.

5.  Silly can be super

When your kids act silly in photos - save them.  One of my boys makes a silly face in every family photo and we have to retake them over and over.  Years later, looking back at them, they made a great photo montage.  The photos above were taken by siblings... sometimes a photo thru the eyes of a brother or sister can be priceless.

6.  Back side is Better - a cure for less-loved printed paper

These white photo mats are actually the back side of the old printed paper that was only printed on one side.  I had a bunch of old storybox papers and some of the printed sides were designs that I didn't particularly care for - but, turn them over and they become beautiful bright white photo mats.

As a consultant I have a lot of older paper and embellishment products.  I'm always determined to use up my supplies - there are loads of ways to go about it that also help you to complete your pages - FAST!

Happy Scrapping!

Sunday, April 17, 2011

Graduation Album Plan

My oldest son (second child) will graduate from high school in June of this year.  When my daughter graduated from high school I had an entire room of albums displayed for our guests to peruse.  I want to offer the same thing at my son's graduation.  BUT... I am way behind.  I need a plan.  Often, I find that if you make a plan for the albums you need to complete and then take a look at it on paper, it's not quite as daunting as it seems when the tasks only exist inside your head.  So... I got down to it and made myself a task list.  I feel like I'm in much better shape that I believed myself to be.  Well, that certainly does count the fact that I just spent most of today and yesterday completing about 50 traditional album page layouts which allowed me to just about complete THREE of the traditional album projects that were looming over me.

Below is the chart I made for myself and how far along I am in completing the tasks - WISH ME LUCK and please, cheer me on.  I'd love to complete all of these album projects to celebrate the full 18 years of his life at this turning point in his life.

Keep posted - the next two posts will cover: Categorical Albums, Traditional Tips and Tricks that relieve album stress.  Happy Scrapping!

Friday, April 8, 2011

Palette Party!

Okay... a word about Power Palettes.


A Power Palette is essentially a traditional album maker's dream kit.  Power Palettes (PPs) use a variety of products (decorative and tonal papers, photo mats, journaling boxes, ABC sets, stickers, titles, ribbons and other embellishments) all in one coordinating color palette.  Once you purchase a PP, you can still be as creative as you wish with your traditional pages - however... your work and your choices are easier.

Select pieces from a PP and they will all coordinate on your page.  There are PPs for both digital and traditional albums.  As always, the cool thing about a digital PP (at the price of about $10) is that you NEVER use up the supplies in a digital package.  The cool thing about traditional PPs in April is that the two newest ones (Rugged and Fabulous) are ON SALE THIS MONTH!  For about $20 off!  That's a huge savings.  Just click the bolded words above to be directed to my website to purchase them.

Some ideas for the Rugged (masculine from babies to grandpas) and Fabulous (from newborns to oldies) are below.  Last year, Creative Memories introduced the Discover and Delight PPs (and a few other cM packages).  Rugged and Fabulous replace those.  It's awesome that CM has found a way to keep the same themes, but update us with new designs.  Who wants to use the same old stuff year after year - right?

I made these cute borders with Delight and Discover.  I'd like to see you put them to use with Rugged and Fabulous.  In advance, I will thank all the people who inspired these page design elements for me.  I was inspired by ideas I found from other consultants and also from the Creative Memories project center.  I'll be doing a future post on digital PPs using a variety of our digital PP kits.  Stay tuned by following my blog (click the follow tab) or adding me to your RSS feed.  Enjoy!


Friday, April 1, 2011

Match Your Wrap with Custom Cards

I'm a Creative Memories consultant.  I've been a consultant for over NINE years!  So it goes without saying that I own a lot of Creative Memories paper and stickers. 
Title Stickers  Decorative Stickers
Creative Memories (now) comes out with new products every two months - and sometimes more often with digital products.  So it goes without saying that I constantly purchase new stuff.  OF COURSE!

However, paper and stickers and other scrapbook products don't always get USED as fast as I'd like (meaning I'm always behind with my album projects).  Really, I am behind.  Even though I've made TONS of albums for my family and friends - I am not caught up.  At all.  It could be because I take lots of photos or my album ambitions are too high - but basically I think I have the same problem as everyone else.  There just aren't enough hours in the day.

One promise I made to myself a few years ago was that I would only PERSONALLY open a new product if I was A) going to use it myself right away in a project or B) going to create a scrapbook lesson for the purpose of teaching about a specific product.  I have done pretty well at sticking to that promise.  I swear I have.  Even though I get ALL of my products at 30% off as a consultant, even the ones that are on sale - I have stuck to the promise. 

(If I've peaked your interest, yes... you can be a consultant too - just go to my website by following this link and fill out the online form and for a mere $50 you'll have the 30% off privileges too and you can of course earn money selling our fantastic products to your friends and family).

Another promise I made to myself was that I would MAKE ALL OF MY CARDS!  I would stop paying upwards of $4 for a Hallmark (or other) greeting card when I could make more beautiful ones myself.  Besides, once I've used a Power Palette or Additions Pack over and over and over again in my albums, I want to purchase something NEW from Creative Memories so by using up the older paper, I can fill in my supply with new stuff.

Making cards is EASY.  One thing I love to do is to make cards that match my wrapping paper.  Yes you can make your own wrapping paper too.  But often, I end up buying wrapping paper from one of the cute little elementary school kids that comes to my door bearing a Sally Foster or Innisbrook catalog and smiling a sweet little smile at me and telling me about their school fundraiser - who can resist right?

Making cards is also FAST.  I love tools (my Creative Memories supply promise does NOT in any way apply to buying new tools BTW).  Tools don't get used up, can be used again and again and also make the job go more quickly.  I use a lot of tools to make my cards (I'll talk about my favorite card making tools below).

Just the other day I made a birthday card to match the wrapping paper I used for my son's birthday gifts.  Here are some photos of that card with the wrapped gifts.


I'm a real sucker for cards that coordinate with paper but I've never been a big fan of buying matching sets.  I have no explanation for my dislike of purchasing matching sets.

For my sister, I added a piece of wrapping paper to a re-gifted gift bag and made a card to match both the gift bag and the purse I sewed for her on her birthday.


Here are some cards to make that would look cute with these hand sewn gifts I made for my 3 year old nephew a few years ago.
Scallop Circle Maker Ice Cream Cone Project IdeaCheerful Birthday Addition Card IdeaParty Card Idea

These cards and instructions for how to make them can all be found at the Creative Memories project center (a wonderful resource for using Creative Memories products to make cards, album pages and MORE).

Don't worry if you aren't a traditional scrapbooker - believe me, the many ways to make DIGITAL scrapbook cards are simply endless!  Using the Creative Memories Storybook Creator PLUS 3.0, you can make basically ANY size custom card you wish AND you can print these custom cards on your home printer or have them printed at a photo developer - the Creative Memories Digital Photo Center is one you may want to try.

Here are some samples of DIGITAL cards:

5x7 Cheerful Birthday Card Project Scrapbook Idea      I'm Turning Five   4x6 Cheerful Birthday Thank You Card Project Idea

There is really no end to the types of cards and the purposes for creating a card: invitation cards, announcement cards, wedding cards, anniversary cards, holiday cards, etc... Take a look at the specialty card options at the digital center by following this highlighted link.

Oh, and just in case you are in the market for Mother's Day cards, there is a sale going on the entire month of April on digital Mother's Day cards.  Click Digital Mother's Day Card Sale for more info.

PLEASE!  Consider posting your cards and your comments and card inspirations you've had or made.

Some of my favorite TOOLS for card making are:

The 12" Rotary Trimmer (especially the scoring blade) 


and finally - the Dual Tip PENS
Related Posts Plugin for WordPress, Blogger...