Do you love PINTEREST? Okay - I admit, I'm obsessed. I think I found pinterest very early after they opened shop and I've been inspired by what I find there ever since. If you'd like to follow me on Pinterest, CLICK HERE.
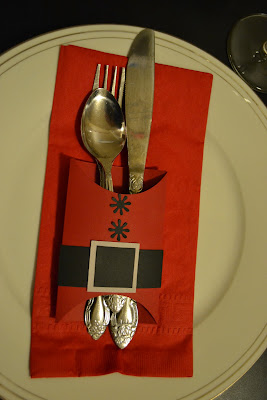
A while back I pinned a santa flatware holder.

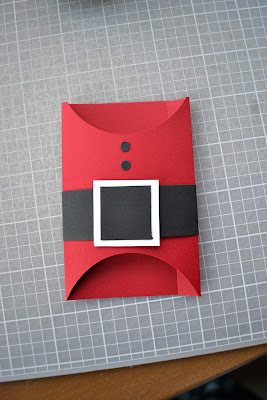
This year I decided to develop a method to make one the Creative Memories way and here's what I came up with. To create your own Santa Holder, here are the steps:
STEP 1: Cut a piece of red cardstock 4" by 6"
STEP 2: Score the cardstock in two places at 1/2" and then 2-3/4" from the first score.
STEP 3: Use the second smallest oval template of the custom cutting system and the red blade to cut away a section of the cardstock from the top and bottom of the red piece. Fold the red cardstock on the score lines and use tape runner to attach the cardstock to itself.
STEP 4: Cut a strip of black cardstock 1" by 6" Wrap it around the holder and secure with tape runner.
STEP 5: Cut a 1" square from black cardstock and a 1-1/4"" square from white, grey or sliver cardstock. Attach the black square to the larger square and attach both squares to the black strip.
STEP 6: Punch 2 "buttons" from black cardstock. My sample used a few pieces that were left over when I made a border using the twinkle cartridge from the border maker. You can use any shape maker or holepunch that will look like black buttons.
STEP 7: Attach the buttons to the holder using either the mini tape runner or adhesive glue pen. TA DAH!
Add flatware or plastic utensils and don your table in Santa decor. Make more and set your table. OR... make the same pattern with green cardstock rather than red and create an elf table for the kids.
LOVE IT!
Hope you do too.
 |
| Sneak peek - santa face placecard holders and twinkle napkin folder. |


Awesome, yet so simple and doable! Your directions are always so clear and understandable, too! Thanks for the inspiration! Can't wait for the Sneak peeks to be revealed!!
ReplyDelete